
Mini Salted Honey Lavender Pies: A Touch of Elegance in Every Bite
Hello, sweet friends! Today, we’re diving into a delightful spring-inspired treat that captures the essence of blooming gardens and golden sunshine: Mini Salted Honey Lavender Pies. Imagine the soothing aroma of lavender wafting through your kitchen, blending with the sweet, subtle notes of honey. It’s like a gentle hug from Mother Nature herself, inviting you to slow down and savor life’s little joys.
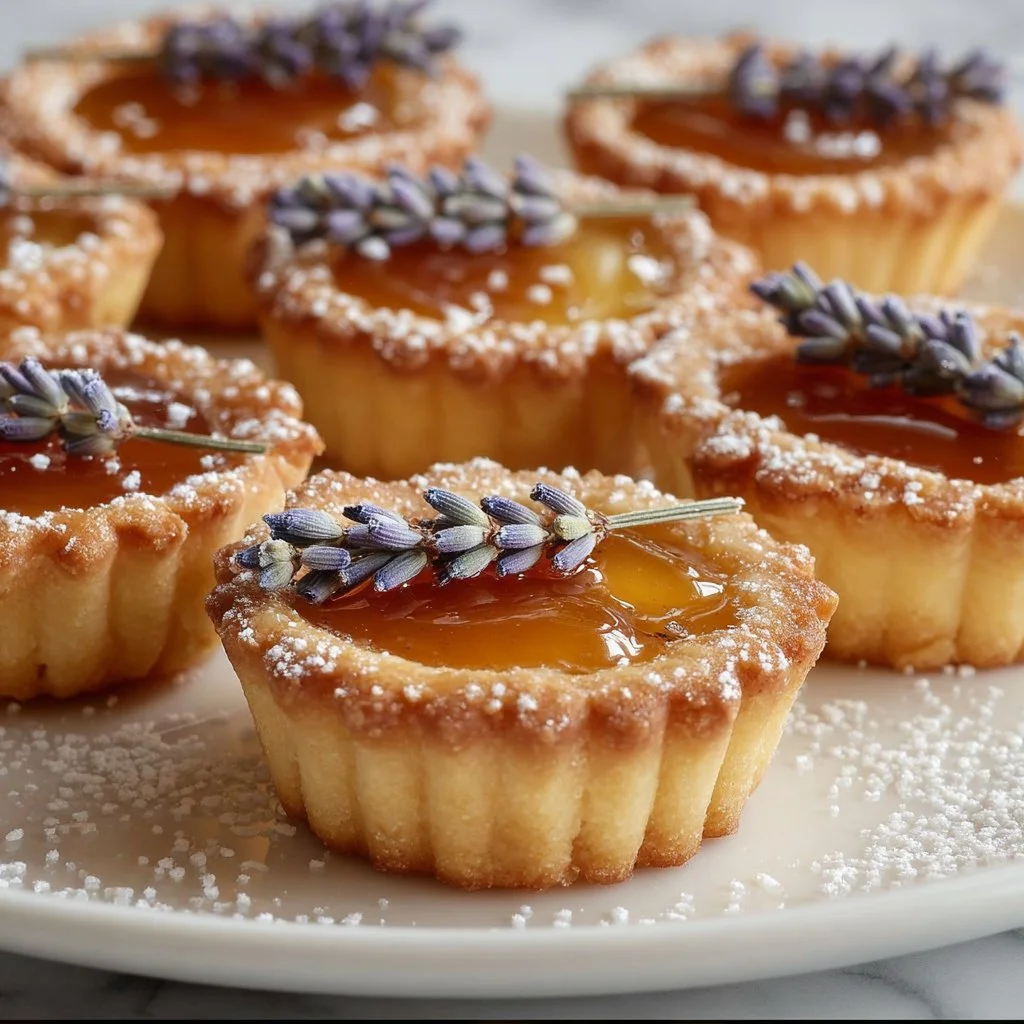
These darling little pies are not just a feast for the palate; they’re a celebration of simple ingredients coming together in a symphony of flavor. The flaky crust holds a creamy, dreamy filling that balances sweet honey and a touch of floral lavender, all topped with a sprinkle of flaky sea salt to elevate each bite. It’s a dessert that feels fancy without being fussy—a perfect treat for a cozy gathering, an afternoon tea, or even just to brighten up your week!
What I love about this recipe is that it effortlessly brings sophistication to your dessert table while showcasing the beauty of seasonal flavors. So, if you’re ready to impress your guests or simply indulge in a sweet moment alone with your favorite cup of tea, let’s roll up our sleeves and get baking!
Personal Story
I remember the first time I tasted lavender in a dessert. I was visiting a quaint little café in a charming town, with rustic wooden tables and the scent of baked goods mingling in the air. They served a lavender-infused honey cupcake that caught my eye, its delicate pastel hue promising something magical. One bite was all it took—I was smitten!
The infusion of lavender with honey created a taste that felt so nostalgic yet entirely new. It reminded me of my grandmother’s garden, where lavender grew wild, and the bees buzzed happily from blossom to blossom. She often said, “Nature’s goodness is the best ingredient,” and this delightful dessert proved her right. That moment stuck with me, sparking the idea for my own recipes incorporating this soothing flower.
Fast forward to today, I’m bringing that captivating flavor into the charming little mini pies we’re making together. Sparkling with memories and the promise of something sweet, these pies are sure to bring a smile to your face, just like that café treat did for me.
Ingredients
Let’s gather our ingredients and gear up for a cozy baking session! Here’s what you’ll need:
-
1 ¼ cups All-Purpose Flour
- This is your classic pie crust base. If you need a gluten-free option, you can use a 1:1 gluten-free flour blend.
-
½ cup Unsalted Butter, cold and cubed
- Cold butter creates that flaky, tender crust we all love. You can substitute with coconut oil for a dairy-free version, but you’ll lose that rich butter flavor!
-
¼ cup Powdered Sugar
- This sweetens the crust while keeping it light and crumbly. If you’re in a pinch, granulated sugar can work too, but be aware it may change the texture slightly.
-
1 Egg Yolk
- This helps bind the crust and gives it a lovely richness. You can use a flax egg (1 tablespoon ground flaxseed mixed with 3 tablespoons water) for a vegan option.
-
1–2 tablespoons Cold Water
- This helps in bringing the dough together. Use iced water for the best results.
-
¼ teaspoon Salt
- A pinch of salt enhances the flavors in both the crust and filling.
-
½ cup Honey
- The star of our filling! Choose a good-quality honey—local if you can find it—for the best flavor.
-
¼ cup Granulated Sugar
- This balances out the honey’s sweetness. Feel free to swap with brown sugar for a deeper flavor.
-
½ cup Heavy Cream
- This adds richness and creaminess. For a lighter dessert, substitute with full-fat coconut milk.
-
½ cup Whole Milk
- It helps achieve a lovely custard-like filling. Almond milk can be used for a dairy-free alternative.
-
2 Large Eggs
- Essential for setting our filling. You could use egg replacers if you’re looking for a vegan option.
-
1 teaspoon Vanilla Extract
- Because everything is better with vanilla! If you’re feeling adventurous, try using lavender-infused vanilla for an extra punch.
-
1 teaspoon Dried Culinary Lavender
- This is where the magic happens! Be sure you’re using culinary-grade lavender. If unavailable, a bit of lemon zest can stand in for a citrusy twist.
-
¼ teaspoon Fine Sea Salt
- Just a pinch to balance the sweet and floral notes.
-
Powdered Sugar for dusting
- A delicate touch for presentation.
-
Flaky Sea Salt
- Your secret weapon for that irresistible sweet-and-salty contrast on top.
-
Fresh Lavender Sprigs (optional)
- For garnish, adding a pop of color and an extra aromatic touch.
Now that we’ve got our goodies sorted, let’s dive into some serious baking!
Step-by-Step Instructions
1. Make the Pie Crust
Start by combining the flour, powdered sugar, and salt in a medium bowl. Whisk them together until they’re evenly mixed. This blend creates the perfect base for your flaky crust.
Chef’s Tip: Sifting your flour isn’t necessary, but if you want to ensure it’s extra light and fluffy, go ahead! Just don’t overmix when you add the butter to preserve that flakiness.
Next, add the cubed cold butter to the flour mixture. Using a pastry cutter or your fingers (my favorite method!), cut the butter into the flour until it resembles coarse crumbs. You want to see small pea-sized pieces of butter—this is what will make your crust flaky.
Pro Tip: If your butter isn’t cold enough, you can chill the mixture in the freezer for about 10 minutes. This step is crucial for achieving that melt-in-your-mouth crust!
Once you’ve got your crumbly magic, add the egg yolk and 1 tablespoon of cold water. Stir gently until the dough begins to come together. If it feels too dry, add an additional tablespoon of water. The goal is to have a dough that holds together without being sticky.
Kneading Hack: Turn the dough onto a lightly floured surface and gently knead it just until it comes together. Overworking will yield a tough crust, so be gentle!
Form the dough into a disk, wrap it in plastic wrap, and refrigerate for at least 30 minutes. This will help it relax and make it easier to roll out.
2. Preheat and Prep
Preheat your oven to 375°F (190°C). Greasing your mini pie pans or muffin tins liberally with butter or non-stick spray can save you from wrestling with stuck crust later on!
3. Roll Out the Dough
Once your dough is chilled, take it out and let it sit at room temperature for about 5 minutes. This makes it easier to roll out. On a floured surface, roll your dough out to about ⅛-inch thickness.
Flour Power: Keep extra flour on hand to dust your work surface and rolling pin, preventing any sticky situations.
Using a round cookie cutter or a glass, cut circles slightly larger than your mini pie pans. Gently transfer each crust circle into the pan, pressing it into the corners without stretching the dough (that’s the secret to avoiding shrinkage!).
4. Blind Bake the Crust
To avoid a soggy bottom and ensure a perfect crust, we’ll blind bake them! Prick the bottoms of each crust with a fork and place a piece of parchment paper on top, filled with pie weights or beans. This keeps the crust from puffing up.
Bake for about 10 minutes, then remove the parchment and weights and bake for another 5 minutes until lightly golden. Allow them to cool slightly while we whip up the filling.
5. Create the Filling
In a medium saucepan, combine honey, granulated sugar, cream, and milk. Place it over medium heat, stirring until the mixture is smooth and just begins to simmer. We want all that sweet goodness to melt into each other.
Remove from heat and let it cool for a few minutes. Once cooled, whisk in the eggs, vanilla extract, dried culinary lavender, and salt until everything is well combined.
6. Fill the Crusts
Pour your airy filling into each cooled mini crust, filling each one about three-quarters full.
Pouring Tip: Use a measuring cup with a spout to avoid mess and ensure each pie has the same amount of filling.
7. Bake to Perfection
Bake the pies for 20-25 minutes, until the edges are set, and the center is just slightly jiggly. Don’t worry if they appear slightly undercooked—the filling will continue to set as it cools.
Once baked, take them out, and sprinkle a touch of flaky sea salt over the tops while they’re still warm.
Cool It: Let them cool for at least 30 minutes before transferring them to a wire rack.
8. Finishing Touches
Before serving, feel free to dust the tops with powdered sugar for an elegant presentation. Garnish with fresh lavender sprigs for a touch of charm, or serve them with a scoop of vanilla ice cream for an indulgent twist.
Serving Suggestions
These Mini Salted Honey Lavender Pies shine on their own, but they’re also fabulous served with a dollop of whipped cream or a scoop of your favorite ice cream. Arrange them on a beautiful platter with some fresh berries and a pot of tea for the perfect afternoon gathering, or wrap them in delicate tissue paper for thoughtful homemade gifts.
Recipe Variations
Just because I adore this flavor combination doesn’t mean you can’t mix it up! Here are a few delightful variations to consider:
-
Chocolate Lavender Pies: Add a couple of tablespoons of cocoa powder to the crust and fill with chocolate ganache instead of the honey-lavender filling for a more decadent treat.
-
Fruit-Infused Filling: Add a splash of fresh fruit juice or puree—like lemon or raspberry—to the filling for a fruity twist.
-
Nutty Crust: Incorporate ground almonds or hazelnuts into the crust for a delightful crunch and flavor boost.
-
Lavender Lemonade Drizzle: Drizzle a lavender lemonade glaze over the top of the cooled pies for an extra citrusy note.
-
Vegan Option: Switch out the honey for maple syrup and use plant-based milk and flax eggs to create a vegan version without sacrificing flavor!
Chef’s Notes
Creating these Mini Salted Honey Lavender Pies has been a delightful journey! The idea evolved from my memories of that enchanting café cupcake into these charming little pies that brighten any occasion. Baking is all about experimenting and letting your creativity shine through. Sometimes, my “kitchen experiments” lead to epic fails, but often they result in surprising delights—like my second attempt at these, which morphed into a lavender-infused crème brûlée when my crust cracked!
Remember, embrace the messiness of the creative process—so much sweetness can come from it!
FAQs and Troubleshooting
Q: Why is my crust tough?
A: Tough crust often happens from overworking the dough or using warm butter. Keep everything chilled and hand-mix until just combined for the best texture.
Q: Can I use fresh lavender instead of dried?
A: Fresh lavender can be used, but be cautious with the quantity—fresh is more potent, so use about half the amount of dried.
Q: How do I know when my filling is set?
A: The edges should be set but the center will still have a slight jiggle. It will firm up as it cools, so don’t be tempted to overbake!
Q: Can I make these ahead of time?
A: Absolutely! You can bake the pies ahead of time and store them in the refrigerator for up to 3 days. Just reheat gently in the oven before serving.
Nutritional Info
While I tend to focus more on the love and flavors behind recipes rather than the numbers, here’s a rough estimate for each pie:
- Calories: Approximately 220
- Total Fat: 12g
- Saturated Fat: 7g
- Carbohydrates: 25g
- Sugars: 10g
- Protein: 3g
Final Thoughts
So there we have it, dear bakers! These Mini Salted Honey Lavender Pies are not just treats, but little moments of joy wrapped up in a buttery crust. I hope you feel inspired to bring a bit of sweetness into your kitchen and share the love with friends and family. With every bite, remember to savor the nostalgia and warmth, because that’s what baking is all about. Happy baking, and let the sweet aromas fill your home!
PrintMini Salted Honey Lavender Pies

Delightful mini pies filled with creamy honey and lavender, perfect for spring gatherings.
- Prep Time: 45 minutes
- Cook Time: 35 minutes
- Total Time: 80 minutes
- Yield: 12 servings 1x
- Category: Dessert
- Method: Baking
- Cuisine: American
- Diet: Vegetarian
Ingredients
- 1 ¼ cups All-Purpose Flour
- ½ cup Unsalted Butter, cold and cubed
- ¼ cup Powdered Sugar
- 1 Egg Yolk
- 1–2 tablespoons Cold Water
- ¼ teaspoon Salt
- ½ cup Honey
- ¼ cup Granulated Sugar
- ½ cup Heavy Cream
- ½ cup Whole Milk
- 2 Large Eggs
- 1 teaspoon Vanilla Extract
- 1 teaspoon Dried Culinary Lavender
- ¼ teaspoon Fine Sea Salt
- Powdered Sugar for dusting
- Flaky Sea Salt
- Fresh Lavender Sprigs (optional)
Instructions
- Make the pie crust by mixing flour, powdered sugar, and salt. Add cold butter until crumbly.
- Add egg yolk and cold water; stir until dough forms. Chill for 30 minutes.
- Preheat oven to 375°F (190°C). Grease mini pie pans.
- Roll out dough to ⅛-inch thickness, cut circles, and place in pans.
- Blind bake crusts for 10 minutes, remove weights, then bake for another 5 minutes.
- In a saucepan, combine honey, sugar, cream, and milk; heat until smooth.
- Remove from heat and whisk in eggs, vanilla, lavender, and salt.
- Fill the baked crusts with the mixture, about three-quarters full.
- Bake for 20-25 minutes until edges are set, sprinkle with flaky sea salt.
- Cool for at least 30 minutes, dust with powdered sugar before serving.
Notes
Serve with whipped cream or ice cream for an indulgent treat.
Nutrition
- Serving Size: 1 pie
- Calories: 220
- Sugar: 10g
- Sodium: 150mg
- Fat: 12g
- Saturated Fat: 7g
- Unsaturated Fat: 5g
- Trans Fat: 0g
- Carbohydrates: 25g
- Fiber: 1g
- Protein: 3g
- Cholesterol: 60mg
Keywords: honey lavender pies, mini pies, spring dessert, floral desserts