
Indulge in Bliss: Rose Pistachio Cheesecake Ice Cream
Hello, my fellow food lovers! Today, I’m thrilled to bring you a delightful recipe that combines the dreamy essence of a classic cheesecake with the creaminess of ice cream and the enchanting flavors of rose and pistachio. Yes, you guessed it — it’s Rose Pistachio Cheesecake Ice Cream! 🌹🍦
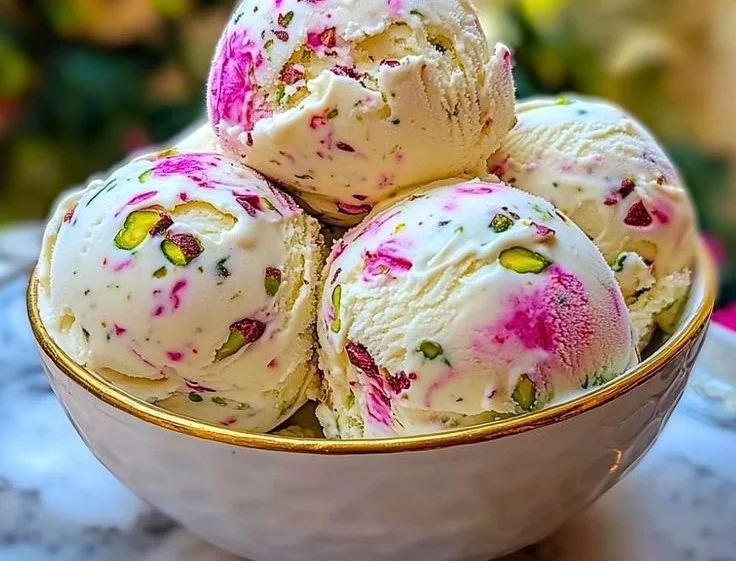
Imagine a hot summer day, the sun shining down, and you’re sitting on your porch, a scoop of this luscious, creamy ice cream in hand. Each bite is a velvety journey through fragrant rose water, a hint of vanilla, and the delightful crunch of crushed pistachios. The texture is sublime, and it just screams celebration — perfect for parties, picnics, or simply as a treat for yourself.
But what truly makes this recipe special for me are the memories it holds. Growing up, I spent countless summer afternoons in my grandmother’s kitchen, where the air was filled with the comforting scents of her baking adventures. She’d often whip up her signature cheesecake, and I can still hear her laughter as she’d say, “A cheesecake is like life; it gets better the longer you let it set.” Little did I know then that those cherished moments would inspire one of my most beloved creations.
Get your scoopers ready, and let’s dive into the whimsical world of Rose Pistachio Cheesecake Ice Cream! 🥄💕
Personal Story
Thinking back to those sun-drenched days in my grandmother’s kitchen brings a smile to my face. One summer, she decided to host a family reunion, and every relative was tasked with bringing a dish. You can imagine the delicious chaos that ensued!
As soon as I entered her house, I was met with the smell of vanilla and freshly baked crusts. Grandma had a knack for turning ordinary ingredients into something magical. I remember standing on tiptoes, peering into the mixing bowl as she blended cream cheese and sugar, her laughter bubbling over like the batter she was mixing.
That day became a special memory when we created a stunning cheesecake adorned with fruits and drizzled with homemade sauce. I felt like a true kitchen wizard, and the twinkle in my grandma’s eye told me I was following in her footsteps. Little did I know that years later, I would take that cheesecake inspiration and turn it into a summer delight—this Rose Pistachio Cheesecake Ice Cream. It’s not just dessert; it’s a sweet concoction of nostalgia and love.
Ingredients
Here’s what you’ll need to create this heavenly Rose Pistachio Cheesecake Ice Cream:
-
1 cup rose water
This is the star of the show, lending a unique floral note. If you can’t find rose water, you can substitute with orange blossom water for a different, yet equally lovely flavor. -
1 cup heavy cream
Heavy cream makes this ice cream rich and creamy! For a lighter version, you can replace it with half-and-half, but the texture won’t be quite as luxurious. -
1 cup whole milk
Whole milk adds richness to the ice cream base. If you’re looking for a vegan option, try using coconut milk instead. -
3/4 cup sugar
Sweetness and creaminess go hand in hand! You can substitute with honey or agave syrup for a natural twist; just reduce the quantity to taste. -
8 oz cream cheese, softened
Cream cheese gives this ice cream its classic cheesecake flavor. Neufchâtel cheese is a lighter alternative if you’re counting calories. -
1/2 cup crushed pistachios
These not only add a crunchy texture but also enhance the flavor beautifully. If you have nut allergies, consider using sunflower seed crunch for a similar effect. -
1 teaspoon vanilla extract
This adds warm, familiar notes to the ice cream. If you want a deeper flavor, you can try using vanilla bean paste instead. -
1/2 teaspoon salt
A pinch of salt helps to balance the sweetness and bring all the flavors together beautifully!
Step-by-Step Instructions
Ready to make some ice cream magic? Let’s get started!
Step 1: Prepare the Ice Cream Base
-
Mixing the Cream Cheese: In a large mixing bowl, add the softened cream cheese. With a hand mixer or a whisk, beat it until it’s smooth and creamy. You want it to feel as light as a cloud—no lumps here! This will be the smooth foundation for your ice cream.
Chef Tip: Warm your cream cheese slightly in the microwave for about 10 seconds if it’s too firm. It’ll blend much easier!
-
Adding in Sugar: Gradually mix in the sugar until it’s fully incorporated. Trust me; there’s nothing like the sound of sugar whispering into cream cheese; it’s music to every baker’s ears!
Step 2: Create the Creamy Mixture
-
Incorporate Milk and Cream: Pour in the heavy cream and whole milk. Then, add the rose water, vanilla extract, and salt. Using your mixer, blend everything together on medium speed until it’s frothy and wonderful.
Chef Hack: Keep the beat low on your mixer at first to avoid a creamy cloud explosion (we all know that scene!).
Step 3: Chill and Fold
- Fold in Crushed Pistachios: Gently fold in the crushed pistachios, making sure they’re evenly distributed throughout the mixture. You want little nuggets of joy in every bite!
Step 4: Freezing the Ice Cream
-
Chill the Base: Cover your mixing bowl with plastic wrap and chill the mixture in the refrigerator for at least 2–4 hours (or overnight, if you can wait that long!). This additional chilling will enhance the flavors and make the texture creamier.
-
Churn Time: Once chilled, pour the mixture into your ice cream maker and churn according to the manufacturer’s instructions. Usually, it takes about 20-25 minutes to reach that soft-serve texture we all love.
Chef Insight: If you don’t have an ice cream maker, no worries! Pour the mixture into a freezer-safe container and freeze for about 5 hours, stirring every 30 minutes. It’s a labor of love, but totally worth it!
Step 5: Final Freeze
- Final Freeze & Serve: Transfer the churned ice cream into a freezer-safe container and smooth out the top. If you’re feeling fancy, sprinkle a few extra crushed pistachios on top. Seal with a tight lid and freeze for at least 4-6 hours before serving to allow it to set properly.
Serving Suggestions
To serve your Rose Pistachio Cheesecake Ice Cream, scoop it into elegant bowls or cone cups and drizzle a little extra rose water on top for a beautiful presentation. Garnish with fresh mint leaves or additional crushed pistachios, and enjoy this gorgeous treat on a warm afternoon!
Recipe Variations
Feeling adventurous? Here are a few delicious twists you could try:
- Chocolate Swirl Rose Pistachio: Add a swirl of chocolate sauce into the ice cream during the last few minutes of churning for a decadent touch.
- Baklava Inspiration: Stir in some chopped dates and walnuts to bring that baklava flavor to your ice cream.
- Vegan Delight: Use coconut cream in place of heavy cream and cashew cream cheese to keep it dairy-free while still maintaining creaminess.
- Fruit Fusion: Blend in a few crushed raspberries or strawberries for a tangy burst of fruit flavor amidst the creamy backdrop.
Chef’s Notes
You’ll find that this recipe has evolved since I first made it years ago! It started as a basic cheesecake ice cream but gradually transformed as I played around with flavors, textures, and seasonal twists. Some of my fondest moments in the kitchen involve experimenting with flavors inspired by travels and family traditions. Who knew that a simple recipe could pack so many memories, right?
FAQs and Troubleshooting
Q1: Why is my ice cream too soft?
A: This could happen if your mixture wasn’t chilled long enough before churning or if you didn’t freeze it for an adequate amount of time. Make sure it’s icy and firm before serving!
Q2: Can I make this without an ice cream maker?
A: Absolutely! Use the method mentioned above, stirring every 30 minutes to achieve a creamy texture.
Q3: What if I don’t like pistachios?
A: You can easily substitute them with your favorite nuts, like almonds or hazelnuts, or omit them entirely for a smooth rose cheesecake flavor.
Q4: How should I store leftover ice cream?
A: Store it in an airtight container in the freezer for up to 2 weeks for the best texture. It can last a few weeks longer, but the texture may become denser over time.
Nutritional Info
Note: Nutritional information may vary.
- Serving Size: 1 scoops (approximately 1/2 cup)
- Calories: 250
- Total Fat: 18g
- Saturated Fat: 10g
- Carbohydrates: 22g
- Sugars: 18g
- Protein: 4g
Enjoy every creamy, dreamy scoop of this Rose Pistachio Cheesecake Ice Cream, and remember, baking (and making ice cream!) is about love, joy, and creating moments. So grab your spoon, and let’s celebrate life’s little sweetness, one scoop at a time! Happy baking! 🍦💖
PrintRose Pistachio Cheesecake Ice Cream

A delightful ice cream that combines the flavors of classic cheesecake with rose and pistachio, perfect for summer celebrations.
- Prep Time: 15 minutes
- Cook Time: 25 minutes
- Total Time: 180 minutes
- Yield: 4 servings 1x
- Category: Dessert
- Method: Churning and Freezing
- Cuisine: International
- Diet: Vegetarian
Ingredients
- 1 cup rose water
- 1 cup heavy cream
- 1 cup whole milk
- 3/4 cup sugar
- 8 oz cream cheese, softened
- 1/2 cup crushed pistachios
- 1 teaspoon vanilla extract
- 1/2 teaspoon salt
Instructions
- Mix the cream cheese until smooth and creamy.
- Add the sugar gradually until fully incorporated.
- Pour in the heavy cream and whole milk, then add rose water, vanilla, and salt.
- Fold in the crushed pistachios gently.
- Cover the bowl and chill in the refrigerator for 2-4 hours.
- Pour the mixture into an ice cream maker and churn for 20-25 minutes.
- Transfer to a freezer-safe container and freeze for 4-6 hours before serving.
Notes
For a vegan option, use coconut milk and cashew cream cheese. Stir every 30 minutes if not using an ice cream maker.
Nutrition
- Serving Size: 1 serving
- Calories: 250
- Sugar: 18g
- Sodium: 100mg
- Fat: 18g
- Saturated Fat: 10g
- Unsaturated Fat: 6g
- Trans Fat: 0g
- Carbohydrates: 22g
- Fiber: 1g
- Protein: 4g
- Cholesterol: 30mg
Keywords: ice cream, cheesecake, rose, pistachio, dessert