
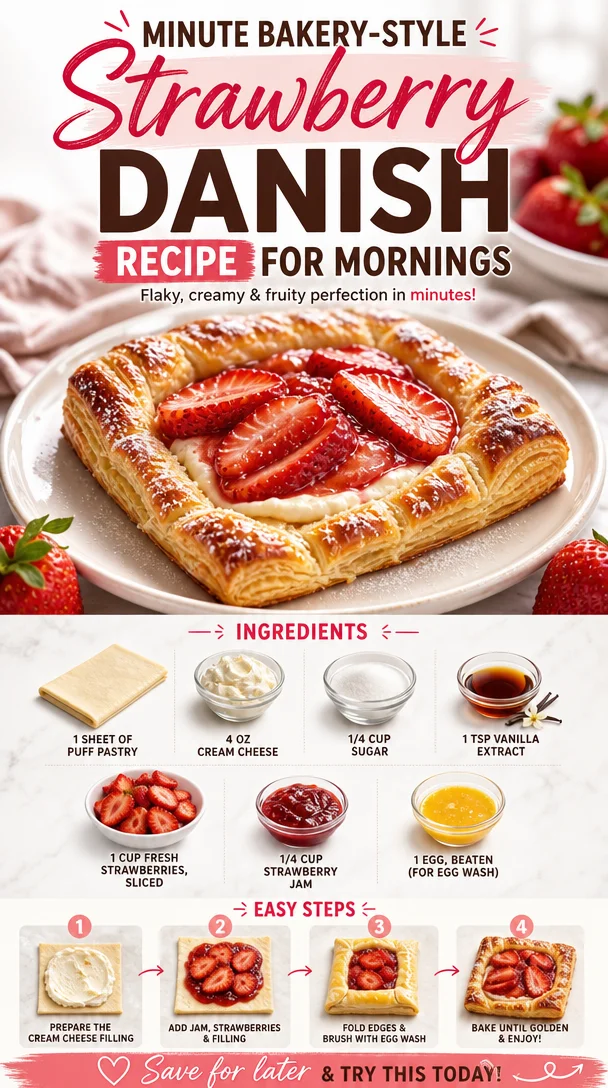
Indulge Your Senses: Homemade Strawberry Danish
Ah, the delightful aroma of baked goods wafting through your kitchen can transform even the dullest day into a moment of pure bliss. Today, we’re diving into a sweet treat that captures the essence of summer — the Strawberry Danish. Flaky puff pastry, creamy filling, and the vibrant taste of fresh strawberries come together to create a dessert that’s not just delicious but also evokes nostalgia. After all, who doesn’t cherish that first bite of a pastry that feels like a warm hug?
There’s something magical about a Strawberry Danish. It’s versatile enough for breakfast, elegant enough for dessert, and comforting enough to enjoy on a rainy afternoon. Imagine serving these little beauties to friends at brunch, or cozying up with one while enjoying a cup of coffee as the rain taps softly on your window. Every bite sings with the charm of homemade goodness, and the best part? You don’t need to be a professional baker to make this happen in your own kitchen!
So, grab your apron, tie it on tight, and let’s whisk you away to your happy place with this wonderful recipe. With just a few simple ingredients, you’ll be able to create something that not only satisfies your sweet tooth but also impresses anyone lucky enough to share it with you. Let’s get baking!
A Slice of Nostalgia: My First Danish Experience
The first time I tasted a Danish pastry, I was about eight years old. My family had just returned from a summer vacation in Denmark, where my parents relished in the art of pastry making. My mother brought back a cookbook filled with recipes that spoke of flaky layers and sweet fillings. I remember watching her in the kitchen, a whirlwind of flour and enthusiasm, as she attempted to recreate our vacation’s magic.
One rainy afternoon, she plopped a warm, freshly baked Danish in front of me, its golden crust glistening with a touch of glaze. A mix of cream cheese and strawberries nestled inside beckoned me as I took my first bite. The flaky layers combined with the creamy sweetness took me right back to that quaint little bakery we visited in Copenhagen. That moment ignited my passion for baking, leading me to create Sweet Ladle and experiment with flavors, textures, and, most importantly, the stories behind our favorite dishes. It’s my hope that this Strawberry Danish carries on that tradition of wonderful memories and sweetness for you.
Ingredients You’ll Need
Here’s what you’ll need to make your very own Strawberry Danish — simple and straightforward, just like baking should be! Let’s take a look at each ingredient so you can become the kitchen hero you’re meant to be.
-
1 sheet of puff pastry
The star of our Danish! You can find puff pastry in the freezer section at your grocery store. If you want to go homemade and venture on a fun puff pastry journey, go for it! Otherwise, store-bought will save you time and still yield fabulous results. -
4 oz cream cheese
Cream cheese gives us that rich, creamy filling we adore. If you’re looking for a lighter option, try using Neufchâtel cheese or Greek yogurt for a similar texture with fewer calories. -
1/4 cup sugar
Just the right amount of sweetness to balance the tanginess of the cream cheese and the strawberries. If you want to experiment, try substituting granulated sugar with coconut sugar or maple syrup — just adjust the volume accordingly! -
1 tsp vanilla extract
This adds a lovely depth of flavor to our filling. Always opt for pure vanilla extract over imitation if you can — the difference in flavor is worth it! -
1 cup fresh strawberries, sliced
Fresh strawberries are the essence of our Danish! Look for ripe, juicy berries to really enhance the flavor. Can’t find fresh? Frozen will work in a pinch; just let them fully thaw and drain the excess moisture. -
1/4 cup strawberry jam
This will help keep our pastry moist and adds an extra layer of strawberry goodness. Use homemade or store-bought depending on your preference. You can also swap it for any preferred fruit preserves! -
1 egg, beaten (for egg wash)
An egg wash will give our Danish that shiny finish after baking. If you’re skipping the egg, a splash of milk or cream brushed on top will work, too.
Step-by-Step Instructions
Now that we have our ingredients ready, let’s roll up our sleeves and get to baking! Follow these detailed steps, and I promise you’ll nail this Danish like a pro.
Step 1: Preheat the Oven
Preheat your oven to 400°F (200°C). This ensures that your pastry cooks evenly and crisps up nicely. While it’s heating, you can prepare the pastry — multitasking is key in the kitchen!
Step 2: Prepare the Puff Pastry
Unroll your sheet of puff pastry on a lightly floured surface. If it’s too cold, let it sit at room temperature for a few minutes until it’s pliable. Gently roll it out with a rolling pin to smoothen the seams and to ensure it’s an even thickness.
Step 3: Cut the Pastry
Using a sharp knife or a pizza cutter, slice the pastry into four rectangles. Chef Tip: Don’t worry if they’re not perfect — rustic charm is totally in style!
Step 4: Create the Filling
In a mixing bowl, combine the cream cheese, sugar, and vanilla extract. Beat them together until smooth. You want this filling creamy but not overly runny. It should hold its shape well. If you want a hint of zest, you can add a splash of lemon juice.
Step 5: Assemble the Danish
Now comes the fun part! On each rectangle of puff pastry, create a border by slicing a smaller rectangle about 1 inch inward from the edges without cutting all the way through. Gently fold back the edges to create a little wall for our filling.
Spread a layer of strawberry jam at the center, followed by a generous dollop of the cream cheese mixture. Top it off with a few slices of fresh strawberries. Pro Tip: Arrange the strawberries in a lovely pattern — it doesn’t just taste good; it looks beautiful too!
Step 6: Apply the Egg Wash
Brush the borders of the pastry with the beaten egg to give it that golden finish. It’s like giving your Danish a shiny, fresh haircut!
Step 7: Bake
Carefully place the pastries on a lined baking sheet. Bake them in the preheated oven for about 15-20 minutes, or until they’re puffed up and golden brown. Keep an eye on them near the end — no one likes an overbaked pastry!
Step 8: Cool and Serve
Once out of the oven, let the Danish cool for a few minutes. Trust me; you want to let them set before you dig in. Serve them warm for the best experience!
Serving Suggestions
For a lovely presentation, dust the cooled Danish with powdered sugar and serve them on a beautiful platter. Pair it with a dollop of whipped cream or a scoop of vanilla ice cream for that extra indulgence. They’re perfect for brunch, an afternoon treat, or even as a special dessert after dinner!
Recipe Variations
Feeling adventurous? Here are some fun twists and variations to put your own spin on this classic recipe:
- Cream Cheese Swirl: Add a swirl of lemon or almond extract to the cream cheese mixture for a unique flavor profile.
- Berry Medley: Mix in other berries like raspberries or blueberries along with the strawberries for a berry medley.
- Nutty Touch: Sprinkle some chopped almonds or hazelnuts on top before baking for added crunch and flavor.
- Chocolate Love: Drizzle melted chocolate on top once cooled for a decadent twist!
- Vegan Option: Substitute the cream cheese with vegan cream cheese or whipped coconut cream, and use a plant-based egg alternative.
Chef’s Notes
Baking this Strawberry Danish has been a phenomenal journey for me over the years. I often find myself experimenting with the filling, using whatever fruits are in season or leftovers from my previous bakes. It’s a joy to share this simple recipe, which has evolved with my experiences and tastes.
I remember one particularly enthusiastic summer when I invited friends over to share some freshly baked pastries. Let’s just say that a few people ended up with powdered sugar on their noses, and we ended up laughing over the mess we made in the kitchen. Those delightful memories remind me that baking is not just about the end result — it’s about the journey and the connection we create with others in the process.
FAQs and Troubleshooting
1. My Danish didn’t puff up! What went wrong?
If your puff pastry didn’t puff as expected, it might be due to it being too warm when it went in the oven or not rolled out evenly. Make sure your oven is fully preheated, and keep the pastry chilled right before baking.
2. Can I make these ahead of time?
Absolutely! You can prepare the filling in advance, assemble the Danish, and store them in the refrigerator for a day. Just pop them in the oven when you’re ready to bake, adding a couple of extra minutes to ensure they are thoroughly heated.
3. My strawberries released too much juice. How can I prevent this?
To prevent sogginess, pat your strawberries dry before slicing. You can also toss them lightly in a bit of sugar and let them sit to draw out excess moisture before adding them to the Danish.
4. Can I freeze the Danish?
Yes! Freeze them before baking on a lined baking sheet until firm, then transfer to an airtight container. When you’re ready to bake, let them thaw in the fridge overnight and then bake as directed.
Nutritional Info
Each serving (1 Danish) contains roughly:
- Calories: 280
- Protein: 4g
- Fat: 16g
- Carbohydrates: 29g
- Sugar: 6g
(calories may vary based on specific brands and ingredient choices).
Now that you have this delightful Strawberry Danish recipe in your baking arsenal, it’s time to gather some friends or indulge in some “me time.” Let the sweet aroma fill your space and remember — the best memories are made in the kitchen. Happy baking!
PrintHomemade Strawberry Danish

A delightful Strawberry Danish with flaky puff pastry, creamy filling, and fresh strawberries, perfect for any occasion.
- Prep Time: 20 minutes
- Cook Time: 20 minutes
- Total Time: 40 minutes
- Yield: 4 servings 1x
- Category: Dessert
- Method: Baking
- Cuisine: Danish
- Diet: Vegetarian
Ingredients
- 1 sheet of puff pastry
- 4 oz cream cheese
- 1/4 cup sugar
- 1 tsp vanilla extract
- 1 cup fresh strawberries, sliced
- 1/4 cup strawberry jam
- 1 egg, beaten (for egg wash)
Instructions
- Preheat the oven to 400°F (200°C).
- Unroll the sheet of puff pastry on a lightly floured surface.
- Slice the pastry into four rectangles.
- Combine the cream cheese, sugar, and vanilla extract in a mixing bowl.
- Create the filling by spreading a layer of strawberry jam and a dollop of the cream cheese mixture on each rectangle.
- Brush the pastry borders with the beaten egg.
- Bake the pastries in the preheated oven for about 15-20 minutes, or until golden brown.
- Let the Danish cool for a few minutes before serving.
Notes
Feel free to experiment with different fruits or toppings such as powdered sugar or chocolate drizzle.
Nutrition
- Serving Size: 1 Danish
- Calories: 280
- Sugar: 6g
- Sodium: 300mg
- Fat: 16g
- Saturated Fat: 8g
- Unsaturated Fat: 8g
- Trans Fat: 0g
- Carbohydrates: 29g
- Fiber: 1g
- Protein: 4g
- Cholesterol: 40mg
Keywords: Strawberry Danish, pastry, dessert, baking, brunch, homemade