
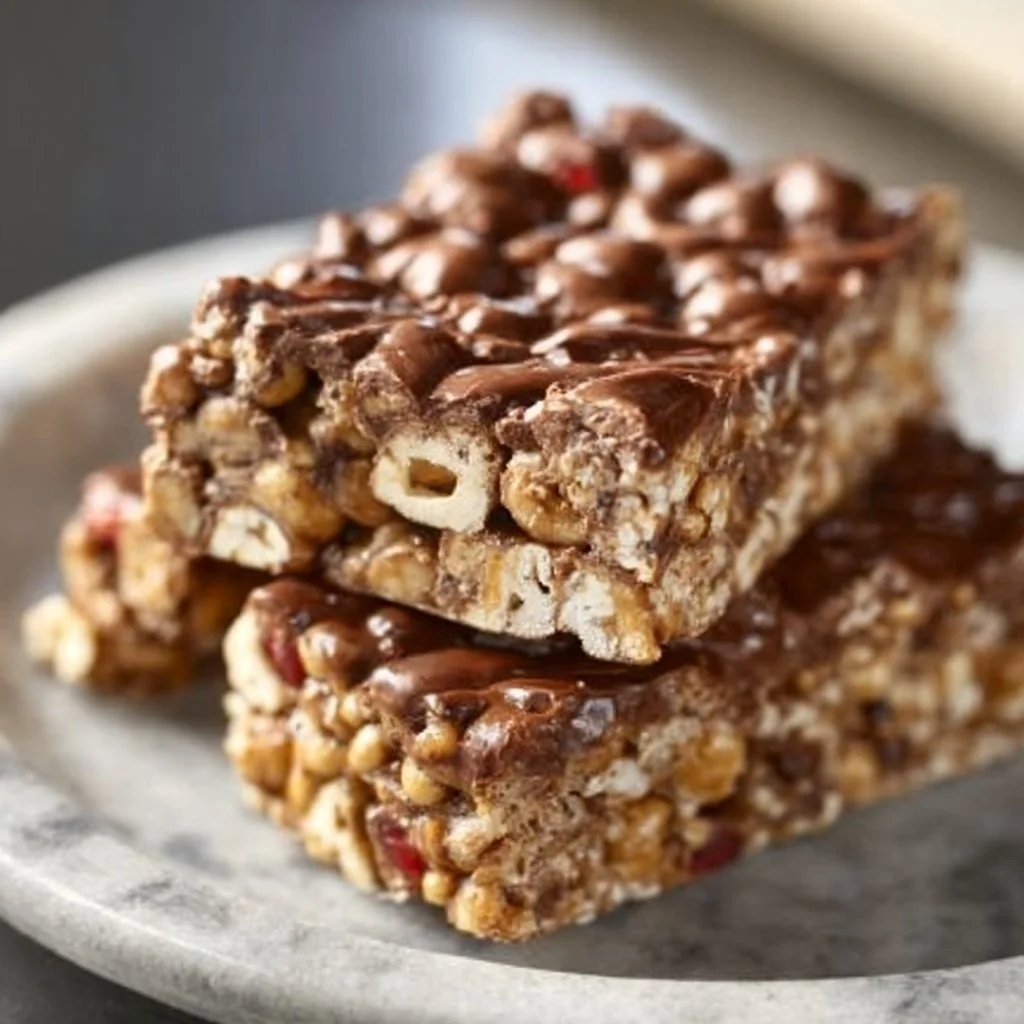
The Sweet Crunch of Homemade Crunch Bars: An Award-Winning Recipe!
Welcome, sweet friends! Today we’re diving into a delightful treat that’s guaranteed to bring joy to your kitchen and smiles to your faces: homemade crunch bars! These chewy, crispy, and utterly scrumptious bars are a nostalgic favorite for many and an absolute must-have in my dessert repertoire.
Imagine biting into a crunchy, chocolatey square that feels like a comforting hug. Whether you’re reminiscing about childhood snacks or simply craving something sweet, this recipe will have you reaching for the ingredients faster than you can say “Sweet Ladle!” So, come on, let’s preheat that oven and get to baking. Your home will be filled with aromas that smell like happiness in no time!
A Sweet Memory of Crunch Bars
I still remember the first time I discovered the magic of crunch bars. It was a warm summer afternoon, and my best friend Lisa invited me over for a bake-off. With flour-dusted countertops and our favorite music playing in the background, we launched into a full-fledged kitchen adventure.
Lisa pulled out a crumpled, old recipe card handed down from her grandmother, titled "Crispy Crunchy Bars." I watched as she melted gooey chocolate over the stovetop and stirred in crispy rice cereal, all while sharing funny stories about her family’s baking mishaps. We added an extra sprinkle of love (and maybe a few secret ingredients) to the mix.
When we finally took our first bite, it was like fireworks in our mouths! The blend of textures and flavors was incredible. It instantly transported me back to carefree afternoons as a child, enjoying these treats after a long day of playing outside. From that day on, homemade crunch bars became my go-to recipe for gatherings, celebrations, or just because. Let me share this award-winning recipe with you!
Ingredients
Here’s what you’ll need to whip up these crunchy delights, along with some chef insights and substitution tips:
-
2 cups of crispy rice cereal
This is the magic ingredient that gives our bars their delicious crunch. For a gluten-free option, look for rice cereal labeled as gluten-free! -
1 cup of smooth peanut butter
Creamy peanut butter enhances the flavor and binds the bars together. You can substitute it with almond butter or sunflower seed butter if you’re nut-free. -
1 cup of dark chocolate chips (or milk chocolate)
Choose your preference! Dark chocolate has a more intense flavor, while milk chocolate is sweeter and creamier. You could even try white chocolate for a fun twist! -
½ cup of honey or maple syrup
This natural sweetener adds sweetness and helps hold everything together. For a vegan alternative, maple syrup works perfectly! -
1 teaspoon of vanilla extract
A splash of vanilla elevates the flavor profile, making it more aromatic. You could skip this if you’re in a pinch, but I highly recommend it! -
A pinch of salt
Salt strengthens the flavors, balancing out the sweetness. If you’re using salted peanut butter, you might want to skip this.
Step-by-Step Instructions
Let’s quickly dive into the steps to create these irresistible treats!
-
Prepare Your Baking Dish
Start by greasing an 8×8 inch baking dish with butter or lining it with parchment paper (for easier removal later). Your future self will thank you for not having to scrub hardened chocolate! -
Melt the Chocolate
In a small saucepan over low heat, melt the dark chocolate chips until smooth. Stir gently to avoid sticking or burning. Chef Tip: You can also use a microwave by heating in 30-second intervals, stirring in between to prevent overheating. -
Mix the Peanut Butter and Sweetener
In a large mixing bowl, combine the melted chocolate, smooth peanut butter, honey (or maple syrup), and vanilla extract. Mix until fully combined. The warm chocolate will help soften the peanut butter, making it easier to blend! -
Fold in the Rice Cereal
Gently fold in the crispy rice cereal. Chef’s Hack: Use a rubber spatula to ensure everything is coated evenly without crushing the cereal too much. We want that crunch! -
Add the Salt
Sprinkle a pinch of salt over the mixture and fold once more. This tiny step makes a big difference! -
Spread in the Dish
Pour the mixture into the prepared baking dish. Press it down with evenly spaced fingers or a spatula to ensure it’s nice and compact. This will help the bars hold their shape when cut. -
Chill and Set
Cover the baking dish with plastic wrap and refrigerate for at least 1 hour. Forgetting about these sweet bars can be tough, but the waiting will be more than worth it! -
Cut and Serve
After chilling, remove the bars from the dish and cut them into squares or rectangles—whatever shape you prefer! You can even drizzle some additional melted chocolate on top for a decadent finish.
Serving Suggestions
These crunch bars are fantastic on their own but serve them with a scoop of vanilla ice cream or a dollop of whipped cream for an elevated treat. You can also pack them in lunch boxes or serve as an after-school snack. Trust me; you’ll be the most popular chef in the neighborhood when you whip up a batch of these!
Recipe Variations
Want to switch things up? Here are a few fun ideas:
- Add Nuts: Incorporate roasted peanuts, almonds, or cashews for added crunch and flavor.
- Dried Fruit: Toss in some dried cranberries or raisins for a chewy texture and a hint of tartness.
- Chocolate Drizzle: Melt some extra chocolate and swirl it on top for that fancy bakery look.
- Spices: Add a sprinkle of cinnamon or even a hint of sea salt for a warm touch.
- Nut-free Version: Swap peanut butter with sunflower seed butter and choose nut-free chocolate chips for a school-safe treat!
Chef’s Notes
Over the years, I’ve tweaked this recipe until it became my signature crunchy delicacy. Initially, I thought I had to use a fancy double boiler for melting the chocolate, but then I had a “lightbulb moment”! It’s all about keeping the heat low and constant. And let me tell you, I’ve had my fair share of recipe disasters—like the time I confused chili powder for cocoa powder. Let’s just say those bars were… interesting!
FAQs and Troubleshooting
1. Why are my bars too crumbly?
This usually happens if they didn’t stay pressed down enough in the dish or if there wasn’t enough sticky binder. Try pressing them more firmly next time or adding a touch more peanut butter.
2. Can I use old rice cereal?
While there’s nothing inherently wrong with using older, less crispy rice cereal, the texture may not be as delightful. For the best crunch, opt for freshly opened boxes!
3. How do I store these crunch bars?
You can keep them in an airtight container at room temperature for about a week. If it’s warm, refrigerate them to keep that chocolate firm.
4. Can I freeze these bars?
Absolutely! Wrap them tightly in plastic wrap and store them in a freezer-safe bag for up to three months. Just let them thaw in the fridge before serving for the best consistency.
Nutritional Info
While crunch bars bring joy to your taste buds, here’s a quick look at the nutritional information per bar (based on cut into 16 servings):
- Calories: 120
- Total Fat: 7g
- Saturated Fat: 2.5g
- Carbohydrates: 14g
- Fiber: 1g
- Sugars: 6g
- Protein: 3g
Enjoy these crunchy delights, friends! Remember, baking is all about love, laughter, and a sprinkle of creativity. Whether you follow the recipe to a T or add your personal flair, the heart behind Sweet Ladle is here to guide you. So tie on that apron, embrace the chaos of your kitchen, and most importantly, enjoy every bite of the journey!
PrintHomemade Crunch Bars
Delicious and nostalgic homemade crunch bars that provide a delightful crunch with every bite.
- Prep Time: 15 minutes
- Cook Time: 10 minutes
- Total Time: 75 minutes
- Yield: 16 servings 1x
- Category: Dessert
- Method: Baking
- Cuisine: American
- Diet: Vegetarian
Ingredients
- 2 cups of crispy rice cereal
- 1 cup of smooth peanut butter
- 1 cup of dark chocolate chips (or milk chocolate)
- ½ cup of honey or maple syrup
- 1 teaspoon of vanilla extract
- A pinch of salt
Instructions
- Prepare your baking dish by greasing an 8×8 inch baking dish with butter or lining it with parchment paper.
- Melt the dark chocolate chips in a small saucepan over low heat until smooth.
- Mix the melted chocolate, peanut butter, honey (or maple syrup), and vanilla extract in a large bowl until well combined.
- Fold in the crispy rice cereal gently, ensuring it’s coated evenly.
- Add a pinch of salt and fold once more to combine.
- Spread the mixture into the prepared baking dish and press down firmly.
- Chill the mixture in the refrigerator for at least 1 hour.
- Cut the bars into squares or rectangles after chilling.
Notes
These bars can be served alone or with a scoop of vanilla ice cream for an elevated treat. They also make great lunch box snacks.
Nutrition
- Serving Size: 1 bar
- Calories: 120
- Sugar: 6g
- Sodium: 50mg
- Fat: 7g
- Saturated Fat: 2.5g
- Unsaturated Fat: 4g
- Trans Fat: 0g
- Carbohydrates: 14g
- Fiber: 1g
- Protein: 3g
- Cholesterol: 0mg
Keywords: crunch bars, dessert, homemade snacks, chocolate, no-bake treats