
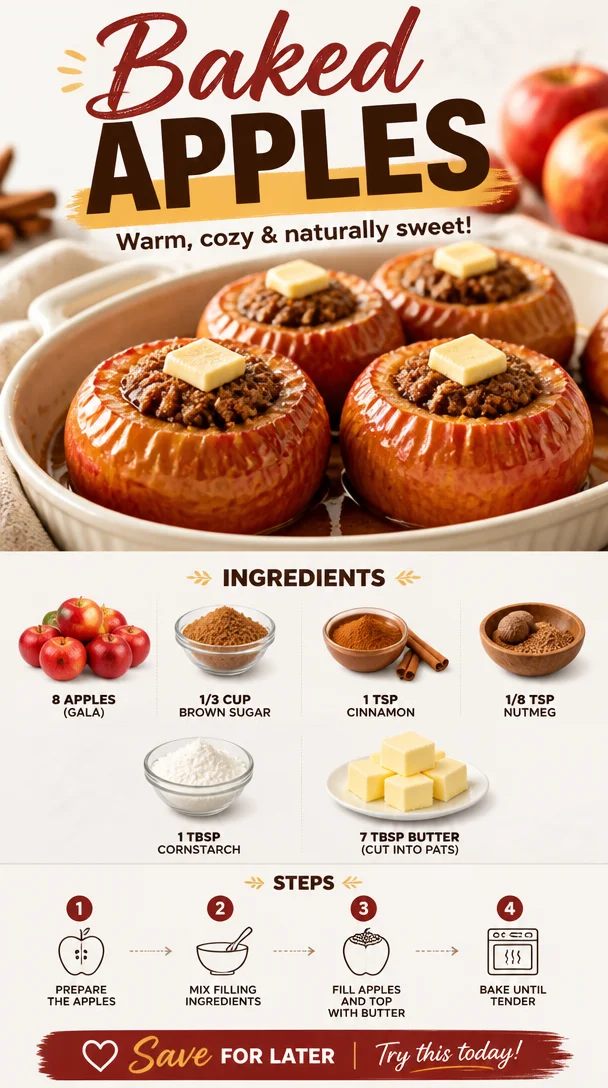
Baked Apples: A Heartwarming Dessert That Tastes Like Home
Hello, sweet friends! Tessa Montgomery here, your go-to home baker on a mission to sprinkle delight into your kitchen with every recipe I share. Today, let’s take a delightful journey together as we whip up a classic comfort dessert—baked apples! This dish is not just delicious; it’s a warm hug in edible form, and yes, it comes with a side of nostalgia.
Now, before we get into the nitty-gritty of how to make these sweet, cinnamon-kissed baked apples, let me tell you why they hold such a special place in my heart. I can’t wait to share my favorite memories tied to this comforting treat, along with my secrets for making it even more incredible!
A Trip Down Memory Lane
Growing up, the aroma of baked apples wafting through the house signaled that something magical was about to happen. I remember coming home from school with the faint scent of cinnamon lingering in the air, hinting that my mom had been up to some sweet mischief in the kitchen. She would often bake a batch of apples to share with my brothers and me after school, along with stories from her day.
I can still picture her carefully coring those plump, juicy apples and filling them with a mixture of brown sugar and warm spices. We’d anxiously gather around as they baked to perfection, the anticipation almost unbearable.
When those golden beauties finally came out of the oven, we’d dive in with spoons at the ready, delighting in the gooey, caramelized sweetness that made our hearts sing. It was a simple pleasure, yet one that felt extravagant at the same time. Those baked apples were about more than just dessert—they were moments of togetherness, laughter, and love.
So, let’s make some memories of our own today as we create our very own baked apple masterpiece!
Ingredients
To make these delicious baked apples, you’ll need the following ingredients:
-
8 Apples (I used Gala): Choose firm apples, as they hold up well during baking. Gala apples are sweet and juicy, but you can also use Granny Smith for a tart contrast, Honeycrisp for a crunch, or even Fuji for their sweetness.
-
1/3 cup Brown Sugar: This adds a lovely molasses flavor and helps create that caramel-like sauce. If you’re out of brown sugar, you can use granulated sugar, but you’ll miss that rich depth. Try adding a hint of molasses or honey to replicate some character!
-
1 tsp Cinnamon: The warm, comforting spice that brings everything together! If you want to mix it up, feel free to experiment with pumpkin spice or allspice instead.
-
1/8 tsp Nutmeg: Just a pinch of this spice will elevate the flavors beautifully. If you’re not a nutmeg fan, you can totally skip it or replace it with a dash of cardamom for a unique twist.
-
1 tbsp Cornstarch: This acts as a thickener to give your filling that nice, gooey texture. If you don’t have cornstarch, you can substitute with all-purpose flour, but be aware it might create a slightly different texture.
-
7 tbsp Butter (cut into pats): Who doesn’t love a touch of butter? It enriches the flavor and keeps everything moist. For a healthier option, try coconut oil or margarine.
Step-by-Step Instructions
Now, let’s get those apples baking, shall we?
-
Preheat your oven to 350°F (175°C). Get your sweet space warmed up; we want it to feel cozy, just like the memories we’ve shared!
-
Prep the Apples: Start by washing your apples thoroughly. Using a sharp knife or an apple corer, remove the core, making sure to leave the bottom intact. You want to create a little well that will hold all that delightful filling.
Chef’s Tip: If you find it tricky to remove the core cleanly, try piercing the apple with a knife then twisting to pop it out. It’s easier than it sounds!
-
Make the Filling: In a bowl, mix the brown sugar, cinnamon, nutmeg, and cornstarch until well combined. This fragrant mixture is what will make your apples shine!
Fun Fact: Brown sugar gets its color from molasses, so if you want to make your own brown sugar, just mix granulated sugar with a little molasses!
-
Fill the Apples: Spoon the filling mixture generously into each apple cavity, packing it down gently. Don’t be shy; the more the merrier!
Chef Hack: If you have any leftover filling, sprinkle it around the apples in the baking dish for extra gooey goodness.
-
Add Butter: Cut your butter into small pats and place them on top of each filled apple. This buttery goodness is what will enrich the flavors as they bake!
-
Bake: Place your apples in a baking dish, and pour a splash of water (about 1/4 cup) into the bottom of the dish to create steam. This will help keep the apples moist. Cover the dish with foil and bake for 25 minutes. Then, remove the foil and bake for an additional 15 minutes or until they are tender and golden.
Chef’s Reminder: Check your apples after the first 25 minutes to see how they’re doing. Depending on the size of your apples, baking time can vary!
-
Serve & Enjoy: Once they’re beautifully baked, let them cool for a few minutes. Serve warm, and of course, don’t forget a scoop of vanilla ice cream or a dollop of whipped cream on the side for a little indulgence!
Serving Suggestions
Now, how to serve these beauties? Picture this: you have your baked apples nestled in a cozy bowl, topped with a scoop of creamy vanilla ice cream that slowly melts as it meets the warm apples. Drizzle some caramel sauce or sprinkle with chopped nuts for added texture. You could even pair it with a cup of warm cider for the ultimate autumn experience. Perfect for enjoying on a chilly day or for impressing friends after dinner!
Recipe Variations
There are so many fun ways to mix things up with your baked apples! Here are a few ideas to inspire you:
-
Caramel Pecan Apples: Add chopped pecans to your filling for a delightful crunch.
-
Cranberry Spice: Toss in some dried cranberries with the filling for a burst of tartness!
-
Chocolate Lovers: Add some dark chocolate chips to the center for an indulgent twist.
-
Nutty Twist: Swap out half of the brown sugar for crushed nuts or almond flour for additional flavor.
-
Healthier Option: Use honey or maple syrup in place of the brown sugar for a lighter yet still sweet outcome.
Chef’s Notes
As someone whose kitchen has evolved over the years, I’ve tried countless variations on baked apples. From experimenting with various apple types to adjusting spices, this recipe has been a canvas for creativity. One time, I made a batch with a splash of orange juice and zest—wow, that elevates the flavor!
The beauty of baked apples is their versatility. Whenever I’m feeling nostalgic or need a little pick-me-up, I simply return to this recipe. There’s something about the warm sweetness that always fills my heart and home with joy.
FAQs and Troubleshooting
-
What should I do if my apples are too hard after baking?
If your apples are still firm, they might need more time in the oven. Cover them again with foil to ensure they steam properly and check every 5 minutes until they reach your desired tenderness. -
Can I use other fruits instead of apples?
Absolutely! Pears work beautifully, as do peaches and even plums. Just keep in mind that their baking times may vary. -
How do I store leftovers?
Store leftover baked apples in an airtight container in the fridge for up to three days. Reheat in the oven for a few minutes, or enjoy cold as a sweet snack! -
Can I make these ahead of time?
Yes! You can prepare them the day before. Just keep them stored in the fridge and bake right before serving!
Nutritional Info
While I’m all about enjoying life’s sweet moments, here’s a little insight into the nutrition. A serving of baked apples (equivalent to one apple with filling) generally contains:
- Calories: 180
- Total Fat: 7g
- Saturated Fat: 4g
- Carbohydrates: 30g
- Fiber: 3g
- Sugars: 20g
- Protein: 1g
Once you peel away the layers of sweetness, you can see how these delightful baked apples can also be a wholesome treat!
So there you have it, friends! A heartfelt recipe for baked apples that’s sure to bring a little warmth to your day. Whether you’re reminiscing about childhood memories or creating new ones, I hope these baked apples find a special place in your kitchen. Happy baking, and let the sweetness begin! 🍏✨
PrintBaked Apples

A classic comfort dessert featuring sweet, cinnamon-kissed baked apples.
- Prep Time: 15 minutes
- Cook Time: 40 minutes
- Total Time: 55 minutes
- Yield: 8 servings 1x
- Category: Dessert
- Method: Baking
- Cuisine: American
- Diet: Vegetarian
Ingredients
- 8 Apples (Gala, Granny Smith, Honeycrisp, or Fuji)
- 1/3 cup Brown Sugar
- 1 tsp Cinnamon
- 1/8 tsp Nutmeg
- 1 tbsp Cornstarch
- 7 tbsp Butter (cut into pats)
Instructions
- Preheat your oven to 350°F (175°C).
- Prep the apples by washing them and removing the core.
- Make the filling by mixing brown sugar, cinnamon, nutmeg, and cornstarch.
- Fill the apples with the mixture.
- Add butter on top of each filled apple.
- Bake for 25 minutes covered, then 15 minutes uncovered.
- Serve warm, optionally with vanilla ice cream or whipped cream.
Notes
Try adding pecans, dried cranberries, or dark chocolate for variations.
Nutrition
- Serving Size: 1 apple
- Calories: 180
- Sugar: 20g
- Sodium: 0mg
- Fat: 7g
- Saturated Fat: 4g
- Unsaturated Fat: 3g
- Trans Fat: 0g
- Carbohydrates: 30g
- Fiber: 3g
- Protein: 1g
- Cholesterol: 20mg
Keywords: baked apples, dessert, comfort food, fall recipe, easy dessert