

Orange Creamsicle Cake: A Slice of Sunshine
Hey there, fellow bakers! I’m thrilled you’ve found your way to Sweet Ladle, where every recipe is infused with warmth, joy, and a sprinkle of nostalgia. Today, we’re diving into a delightful treat that’s bound to bring a smile to your face and the sweet taste of summer to your table: Orange Creamsicle Cake!
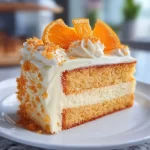
Picture this: a moist, fluffy cake bursting with the zesty brightness of fresh oranges, complemented by a fluffy, sweet orange cream filling that tastes like it came straight from your childhood. The blend of rich cake and creamy frosting mimics those beloved orange creamsicle popsicles we all cherished on hot summer days. So, put on your apron and get ready to whip up a slice of happiness that transports you to sun-drenched afternoons and carefree moments.
Once you nail this recipe, you’ll find it perfect for any occasion — be it a birthday, a casual afternoon tea, or simply a way to savor every day’s sweetness. So, let’s get started!
Personal Story
I must tell you about the first time I baked something inspired by those iconic orange creamsicles. I was a kid, maybe eight or nine, sauntering through the supermarket with my mom. I spotted that familiar orange and white striped popsicle in the frozen section, and my imagination went wild!
That sundrenched summer, I decided to channel my inner chef and bake something that captured that icy treat’s essence. Armed with a box of yellow cake mix and a can of orange soda, I merrily mixed things in the kitchen, feeling like a culinary genius. The result was… well, let’s just say “unique.” But the joy it brought to my family, and the laughter that echoed through our kitchen, made it a memory I’ll cherish forever.
Fast forward to now, having grown a little older and a lot more experienced — I decided to refine that childhood idea into the luscious Orange Creamsicle Cake. With a focus on fresh ingredients and a touch of gourmet flair, this recipe is everything I dreamed it would be back then and more! Try it out, and I promise you’ll feel that same joy I felt as a kid in the kitchen.
Ingredients
Here’s what you’ll need to whip up this sun-kissed delight:
For the Cake:
-
2 cups all-purpose flour: The backbone of our cake — provides structure. You can swap it for a gluten-free flour blend if you need to avoid gluten.
-
1 ½ cups granulated sugar: For sweetness, of course! If you want a more complex sweetness, consider using coconut sugar.
-
½ cup unsalted butter, softened: This adds richness and moisture to the cake. Need a dairy-free option? Try using coconut oil or vegan butter.
-
1 cup fresh orange juice: The star of the show! Fresh-squeezed is best for that vibrant flavor, but store-bought is fine in a pinch.
-
3 large eggs: Helps bind the cake together and provides structure. If you’re vegan, substitute with 1 tablespoon of flax meal mixed with 2.5 tablespoons of water for each egg.
-
2 teaspoons baking powder: This gives the cake a lovely lift. Avoid using baking soda, as it will give a different taste and texture.
-
½ teaspoon salt: Enhances flavor and balances sweetness.
-
Zest of 1 orange: It’s all about that citrusy punch! The zest adds a lovely, fragrant note. If you don’t have fresh oranges, you can use a teaspoon of orange extract instead.
For the Frosting:
-
1 cup heavy cream: This whips up beautifully for a rich frosting. If you prefer a lighter option, use whipping cream or a dairy-free alternative.
-
1 cup powdered sugar: Sweetens the frosting and helps it hold its shape. For a low-sugar option, try monk fruit sweetener.
-
1 teaspoon vanilla extract: Adds depth to your frosting. Use pure vanilla for the best flavor!
For Garnish:
- Fresh orange slices: These not only serve as a beautiful garnish but also bring a fresh burst of flavor. You can also use candied orange peels for an extra sweet treat!
Step-by-Step Instructions
Now that we’ve gathered our ingredients, let’s bring this cake to life with some simple steps!
Step 1: Prepare Your Oven and Pans
First things first! Preheat your oven to 350°F (175°C). While that’s heating up, grab two 9-inch round cake pans and grease them well with butter or non-stick spray. You can also line the bottom with parchment paper for easy removal. Trust me; we want our beautiful cakes to come out intact!
Step 2: Mix the Dry Ingredients
In a large mixing bowl, whisk together the flour, baking powder, and salt. This step ensures an even distribution of the leavening agent and keeps your cake fluffy. Easy peasy!
Step 3: Cream the Butter and Sugar
In another bowl, beat the softened butter and granulated sugar together until light and fluffy. This process is called "creaming," and it helps incorporate air into the butter, giving your cake that lovely texture. Aim for about 3–5 minutes here — patience pays off!
Step 4: Add the Wet Ingredients
Next, crack in those eggs, one at a time, ensuring they’re fully mixed in before adding the next. Then pour in the orange juice and add the orange zest. Mix until everything is combined and light!
Step 5: Combine and Mix
Now, gradually add your dry ingredients to the wet mixture. You can do this in three parts, mixing gently after each addition. Just be careful not to overmix, as that could lead to a denser cake. We want fluffy and airy!
Step 6: Bake the Cakes
Pour the batter evenly into your prepared cake pans. Bake for about 25–30 minutes, or until a toothpick inserted in the center comes out clean. Your kitchen will smell incredible during this time, so get ready for some serious aroma therapy!
Step 7: Cool the Cakes
Once out of the oven, let the cakes cool in the pans for about 10 minutes. Then carefully transfer them onto wire racks to cool completely. This step prevents sogginess!
Step 8: Whip the Cream for Frosting
While your cakes are cooling, let’s whip up the frosting! Using an electric mixer, beat the heavy cream until soft peaks form. Gradually add in the powdered sugar and vanilla extract. Continue beating until you have a nice, spreadable consistency. It should look light and fluffy!
Step 9: Assemble the Cake
Now comes the fun part! Once your cakes are completely cool, place one layer on your serving plate. Spread a generous layer of frosting on top, then place the second layer on. Finish by covering the top and sides with the remaining frosting.
Step 10: Garnish and Enjoy
Finish it off with those lovely fresh orange slices on top. Feel free to get creative — perhaps a sprinkle of orange zest or even a drizzle of chocolate ganache for a twist. Don’t forget to snap some pictures because this cake is a showstopper!
Serving Suggestions
To serve your masterpiece, simply slice it into wedges, making sure every piece gets a taste of that creamy frosting and vibrant orange cake. Pair a slice with a cup of freshly brewed tea or coffee for a delightful afternoon treat, or serve it at your next gathering to wow your friends and family. Remember, sharing is caring!
Recipe Variations
Feeling adventurous? Here are some fun twists you can try with this Orange Creamsicle Cake:
- Lemon Twist: Swap half the orange juice for freshly squeezed lemon juice for a citrusy zing.
- Marble Cake: Swirl in some chocolate or vanilla batter for a beautiful marbled effect.
- Layered Delight: Add a filling of cream cheese between layers to create a surprising tang!
- Nutty Addition: Fold in some toasted walnuts or almonds into the batter for extra crunch.
- Dairy-Free Version: Use almond milk instead of orange juice and coconut cream for the frosting.
Chef’s Notes
Oh, how this recipe has evolved over time! Each time I make this cake, I recall my childhood experiments, and it makes me chuckle. I love playing with flavors and techniques, learning little nuances that improve the process. Whether it’s tweaking the proportions or perfecting the frosting consistency, every bake brings an opportunity for growth and creativity.
And don’t be surprised if this cake leaves your kitchen feeling like a small orange-scented paradise. The laughter and stories shared over a slice of cake mean as much as the cake itself!
FAQs and Troubleshooting
Q1: My cake didn’t rise; what went wrong?
- A: This could be due to expired baking powder or overmixing the batter. Be sure to check your ingredients and mix just until combined.
Q2: Can I make this cake ahead of time?
- A: Absolutely! You can bake the layers ahead of time and freeze them tightly wrapped. Just allow them to thaw before frosting!
Q3: How should I store leftover cake?
- A: Store it in an airtight container at room temperature for up to three days or in the fridge for about a week. If it has cream frosting, refrigerating is best!
Q4: The frosting is too runny; help!
- A: It sounds like the cream wasn’t whipped enough or the room temperature is too warm. You can chill the mixture and whip it again to help achieve those fluffy peaks!
Nutritional Info
Note: This section is optional but may be helpful!
While I believe in enjoying these treats in moderation, here’s a rough estimate per slice (based on 12 servings):
- Calories: 350
- Total Fat: 20g
- Saturated Fat: 10g
- Total Carbohydrates: 40g
- Sugars: 25g
- Protein: 4g
And there you have it, my lovelies — the ultimate Orange Creamsicle Cake recipe! Whipping up this cake is more than just baking; it’s about creating memories, sharing love, and, of course, enjoying every sweet bite! So, let me know how yours turns out — I can’t wait to hear your kitchen stories! Happy baking! 🍊🎂✨
PrintOrange Creamsicle Cake
A moist and fluffy cake bursting with the zesty brightness of fresh oranges, complemented by a sweet orange cream filling.
- Prep Time: 15 minutes
- Cook Time: 30 minutes
- Total Time: 45 minutes
- Yield: 12 servings 1x
- Category: Dessert
- Method: Baking
- Cuisine: American
- Diet: Vegetarian
Ingredients
- 2 cups all-purpose flour
- 1 ½ cups granulated sugar
- ½ cup unsalted butter, softened
- 1 cup fresh orange juice
- 3 large eggs
- 2 teaspoons baking powder
- ½ teaspoon salt
- Zest of 1 orange
- 1 cup heavy cream
- 1 cup powdered sugar
- 1 teaspoon vanilla extract
- Fresh orange slices for garnish
Instructions
- Preheat your oven to 350°F (175°C) and grease two 9-inch round cake pans.
- Whisk together the flour, baking powder, and salt in a large mixing bowl.
- Beat together the butter and sugar until light and fluffy.
- Add the eggs one at a time, then mix in the orange juice and zest.
- Gradually combine the dry ingredients with the wet mixture.
- Pour the batter into prepared cake pans and bake for 25–30 minutes.
- Let the cakes cool in the pans for 10 minutes, then transfer to wire racks.
- Whip the heavy cream, then mix in powdered sugar and vanilla until fluffy.
- Assemble the cake by layering with frosting between the cakes and covering the top and sides.
- Garnish with fresh orange slices and enjoy!
Notes
Feel free to experiment with flavors or make it dairy-free by swapping ingredients as suggested.
Nutrition
- Serving Size: 1 slice
- Calories: 350
- Sugar: 25g
- Sodium: 200mg
- Fat: 20g
- Saturated Fat: 10g
- Unsaturated Fat: 6g
- Trans Fat: 0g
- Carbohydrates: 40g
- Fiber: 2g
- Protein: 4g
- Cholesterol: 60mg
Keywords: orange, cake, desserts, summery, baking