
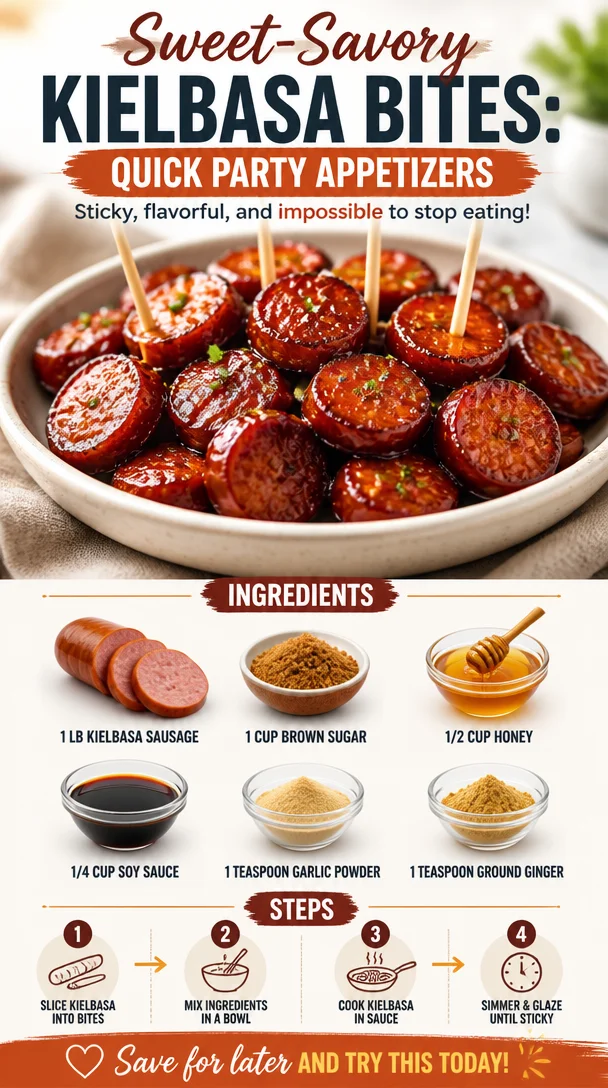
Sweet and Sticky Candied Kielbasa Bites
Hi there, foodie friends! If there’s one dish that can bring people together, it’s a platter of sweet and savory snacks. And today, I’m excited to share with you my ultimate go-to for gatherings: Candied Kielbasa Bites! With their irresistible glaze and mouthwatering flavor, these bites are sure to vanish faster than you can say “more, please!” So, grab your apron and let’s get cooking!
The Ultimate Flavor Fusion
Candied Kielbasa Bites are not just a dish — they’re a delicious memory waiting to happen! I remember the first time I made these little gems. It was a chilly autumn evening, and a close friend was throwing a casual game night. As I rifled through the pantry, I stumbled upon some kielbasa tucked away in the back, long forgotten. I also found a half-open jar of honey and a bag of brown sugar. “What if I made something sweet and savory?” I thought to myself.
As I tossed the ingredients together, anticipation bubbled up in the air. The sweet warmth of honey mingling with the savory smokiness of the kielbasa was incredible! Once the bites hit the table, everyone couldn’t get enough. Those candied morsels were the highlight of the night, paving the way for laughter and shared stories around the table! Fast forward to today, and I still whip up these bites whenever I’m craving a dish that feels like a warm hug – perfect for parties, casual get-togethers, or simply enjoying at home with the family.
Ingredients
Let’s gather our ingredients for these scrumptious Candied Kielbasa Bites. Each component plays a crucial role in delivering that unforgettable flavor.
-
1 lb kielbasa sausage
- Look for a good-quality kielbasa; the flavor packs a real punch! You can swap it for turkey or chicken kielbasa if you want a lighter version, or go with a veggie alternative if you’re keeping it plant-based.
-
1 cup brown sugar
- Brown sugar adds a lovely caramel flavor. If you don’t have any, you can use white sugar or coconut sugar, but be prepared for a slightly different taste.
-
1/2 cup honey
- The nectar of the gods! Honey provides a beautiful gloss to the sauce while balancing the saltiness of the sausage. Maple syrup can work as a substitute in a pinch for a unique twist, but you’ll miss that floral nuance.
-
1/4 cup soy sauce
- This ingredient lends the dish its savory depth. If you need a gluten-free option, switch out soy sauce for tamari or coconut aminos.
-
1 teaspoon garlic powder
- A classic flavor enhancer that adds warmth. You can use fresh minced garlic if you prefer a more robust flavor.
-
1 teaspoon ground ginger
- This adds a lovely zing to the dish. Fresh ginger or even minced ginger can be used if you’re feeling adventurous!
Step-by-Step Instructions
Alright, my friends, it’s time to get cooking! Follow along with these easy steps to create your own Candied Kielbasa Bites.
-
Preheat Your Oven
Preheat your oven to 400°F (200°C). This step is crucial for achieving that crispy, caramelized finish we all love, so don’t skip it! -
Slice the Kielbasa
Cut the kielbasa into bite-sized pieces, about 1-inch thick. This size ensures that they cook evenly and are easy to pop in your mouth — perfect for snacking! -
Prepare the Sauce
In a medium mixing bowl, combine the brown sugar, honey, soy sauce, garlic powder, and ground ginger. Whisk everything together until it’s all blended beautifully. The sauce should thicken slightly from the sugar, creating a sticky magic that will coat the sausages — yum! -
Mix It All Together
Once the sauce is ready, place the sliced kielbasa into a large mixing bowl. Pour the sweet and sticky sauce over the sausage pieces and give it a good toss, ensuring that every bite is well-coated. This is where the magic begins! -
Now, the Baking Time
Line a baking sheet with parchment paper (trust me, it makes for easier cleanup!), and spread the kielbasa pieces evenly across the sheet. Make sure they have some space between them — we want them to roast, not steam! -
Bake to Perfection
Pop the baking sheet into your preheated oven and bake for approximately 20-25 minutes. About halfway through, give them a quick toss to make sure all sides bask in that glorious glaze. Keep an eye on them towards the end — you’re looking for that deep golden-brown color that indicates caramelization. -
Cool & Serve
Once they’re out of the oven, let them cool for a few moments, but not too long! Serve them warm, drizzled in that sticky goodness. They’re best enjoyed straight away, but I won’t tell if you sneak a couple during the cool-down time!
Serving Suggestions
Candied Kielbasa Bites are wonderfully versatile and can be served in many delightful ways! For an elegant touch, serve them on a platter garnished with fresh herbs like parsley or green onions. Pair them with toothpicks for easy munching, or create a build-your-own slider bar with slider buns and your favorite toppings. Trust me; your guests will love loading up their own creations!
Recipe Variations
Feeling adventurous? Here are some fun twists to this classic recipe:
- Spicy Kick: Add a teaspoon of your favorite hot sauce or red pepper flakes to the glaze for an extra zing!
- Cranberry Orange: Mix in some orange zest and dried cranberries to the sauce for a fruity note that pairs wonderfully with the savory sausage.
- Smoky BBQ: Swap out honey for BBQ sauce for a smoky flavor that amps up the barbecue vibe.
- Teriyaki Twist: Replace soy sauce with teriyaki sauce for a sweet and tangy flavor profile.
- Herbal Infusion: Toss in some fresh herbs, like thyme or rosemary, before baking for a fragrant note that brightens the dish.
Chef’s Notes
There’s something so gratifying about Candied Kielbasa Bites. They’ve become a staple in my kitchen’s rotation because they remind me of spending time with friends and family. Each time I make them, I try to mix things up a bit, adding whatever I have on hand. Whether it’s a different type of sausage or a dab of something unusual, watching guests enjoy them always brings a smile to my face.
And remember, the key to these bites is balance! Sweetness, savoriness, and a hint of spice make for the perfect harmony. Even on those chaotic days, taking time to focus on creating something simple yet delightful can really lift your spirits — and who couldn’t use that?
FAQs and Troubleshooting
1. What if the sauce is too thick?
No worries! If your sauce looks a bit too thick while you’re mixing, simply add a tiny splash of water to loosen it up. Whisk again to blend!
2. Can I make this ahead of time?
Absolutely! You can prep the bites a day before. Just store them in an airtight container in the fridge. When you’re ready to bake, bring them to room temperature and then pop them in the oven.
3. My bites are too sticky; how do I fix that?
If they turn out overly sticky, it could be from the glaze caramelizing too much. Be sure to keep an eye on them while baking, and don’t skip tossing them halfway through!
4. Can I freeze them?
Yes! These bites freeze well. Just cool them completely after baking, and then store them in a freezer-safe bag. To reheat, bake directly from frozen at 375°F (190°C) until heated through.
Nutritional Info
While I’m all about comfort food, I also believe in balance! Here’s a rough estimate of the nutritional info per serving (assuming 6 servings):
- Calories: 320
- Total Fat: 18g
- Saturated Fat: 6g
- Carbohydrates: 24g
- Sugar: 16g
- Protein: 12g
Please remember that actual nutritional values can vary depending on your specific ingredients and portion sizes.
I hope you enjoy making these Candied Kielbasa Bites as much as I cherish sharing the recipe with you! Gather your friends and family, whip up a batch, and relish those delightful moments that come with sharing food. Happy cooking! 🍽️
PrintSweet and Sticky Candied Kielbasa Bites

Delicious sweet and savory candied kielbasa bites, perfect for gatherings and parties.
- Prep Time: 10 minutes
- Cook Time: 25 minutes
- Total Time: 35 minutes
- Yield: 6 servings 1x
- Category: Appetizer
- Method: Baking
- Cuisine: American
- Diet: Paleo
Ingredients
- 1 lb kielbasa sausage
- 1 cup brown sugar
- 1/2 cup honey
- 1/4 cup soy sauce
- 1 teaspoon garlic powder
- 1 teaspoon ground ginger
Instructions
- Preheat your oven to 400°F (200°C).
- Slice the kielbasa into bite-sized pieces, about 1-inch thick.
- Prepare the sauce by combining brown sugar, honey, soy sauce, garlic powder, and ground ginger in a medium mixing bowl.
- Mix the sliced kielbasa with the sauce in a large mixing bowl, ensuring each piece is well-coated.
- Line a baking sheet with parchment paper and spread the kielbasa pieces evenly across the sheet.
- Bake for approximately 20-25 minutes, tossing halfway through for even cooking.
- Cool for a few moments before serving warm.
Notes
Serve with fresh herbs and toothpicks for easy munching. Can be prepped a day in advance and stored in the fridge.
Nutrition
- Serving Size: 1 serving
- Calories: 320
- Sugar: 16g
- Sodium: 800mg
- Fat: 18g
- Saturated Fat: 6g
- Unsaturated Fat: 8g
- Trans Fat: 0g
- Carbohydrates: 24g
- Fiber: 0g
- Protein: 12g
- Cholesterol: 45mg
Keywords: kielbasa, appetizers, sweet and savory, party food, game night snacks